Texture
Home Computer Camera Lab Colour Space Post-Processing Tutorials WoW Albums Waffle Index


Return

Knowing your Camera rendering

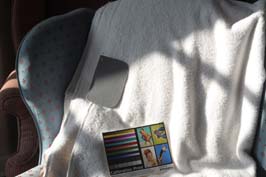
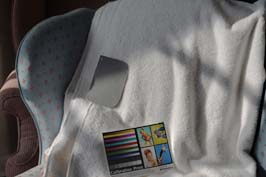
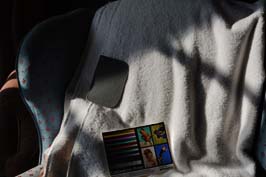
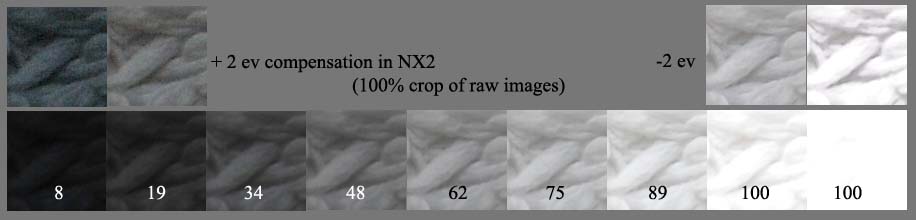
Many people suggest "throwing in the towel" to do the experiment to deduce the EV compensation required (see this Chuck Gardner page) - i.e. include a white towel in the image, take bracketed shots and note when the texture detail is good and disappears.

I tried this with a low contrast light on a towel, a bathmat and another on some jumpers for a bit more contrast.

If you try this, you will notice that where detail is lost depends on the scaling of the image (and print) - yea gods, so now we have to know what size we will print or view the image at before we expose!!!

The results of tests were different depending on the texture and contrast of the subject.

For the bathmat, I took the Raw image and (out of interest) preserved the shadows and highlights in the 2 end exposures to see how much extra detail was present (compared to the jpgs).

These are 100% crops.  The first image is from the D700 and the second P7000 (did I mention I had just got one of these as a birthday present?).

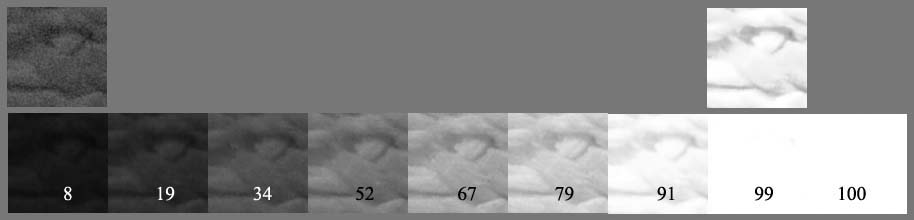
So I can allow 3ev to 4ev to capture zone VII detail - I was impressed.  I read on a forum that some people were dialling in +3.7EV for Zone VII on the D700 - so I'm in the right ball park for raw exposures.

 
However with the 3 jumpers (as shown opposite) and jpg files, it was a different story with (only) 2ev being the highlight end, and almost 4evs for zone III.

When I had some sun (rare these days!) on a towel (finer texture), which added more contrast, things changed for jpgs.  A lot of blown highlights are now present because of the dynamic range of the scene.

Below I show the 100% crops of the shadow area, the light area and the grey card - all centred on the grey card exposure of zone V.


Had I exposed by metering the light area, I would have had to dial in -3ev of compensation to ensure I got all the highlight detail and then would have got this texture ruler for the light area and the photo would have look like this (loosing the shadow detail).


Jumping ahead a bit into post-processing;  I can combining these 2 exposures (the metered grey card and light area).  One can then easily create either of these sort of images (without blown highlights) - depending on ones artistic interpretation of this exciting scene!

From these sort of experiments one can deduce how to compensate for metering off different areas.  There are still quite a few variable to take into account - final image size and dynamic range for instance.  Another rather annoying variable is the small difference between lenses, the dynamic response of different ISO settings and also the Aperture setting.  Nikon support reminded me that actual exposure (as opposed to the meter reading) will vary slightly (0.1-0.2EV) due to the inconsistent aperture control that most lenses seem to exhibit.

They also said  I would strongly recommend to disable the Active D-Lighting if you require consistent exposure results. The Picture Control option should be set to Neutral, however if you shoot RAW and process your images in a 3rd party software this setting will be disregarded

So the bones of exposure control is there, it just needs refining and more awareness of those variable that will influence the compensation required.

Next Page

PS  Incidentally, the D700 jpg exposure ruler is roughly agreeing with Normal Koren's Zones using equations (I do not understand).  Coincidence, or is Nikon aligning with the Zone System?