|


| |
You may find it easier to explore the website using this Content Menu - click here
These pages explain the Lab colour space and how to use it in your
post-processing - it can be much more effective than using RGB.
Take a minute to see the Lab Colour Space,
- it is much more intuitive than RGB and
it can do things other colour modes can not
- you can also explore more about it using
the menu on the left.
- these pages not only explain the colour space, but
how to use it in your post-processing.
- the "Curving in Lab" menu option takes you to a step-by-step guide to
Curving in Lab mode.
The real power of Lab is that tones and
colours are held separately - you can adjust one without upsetting the
other.
The LAB colour space is also the only "device
independent" colour space in Photoshop and the only one representing the
way the human eye sees colour.
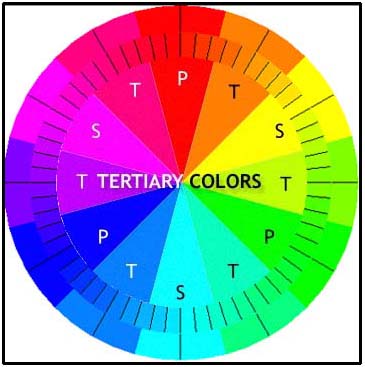
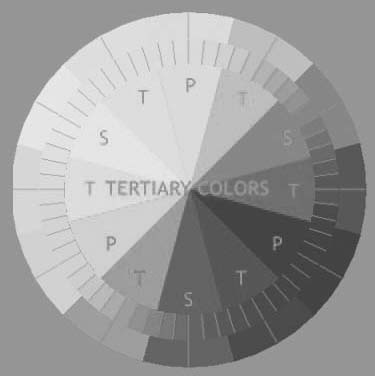
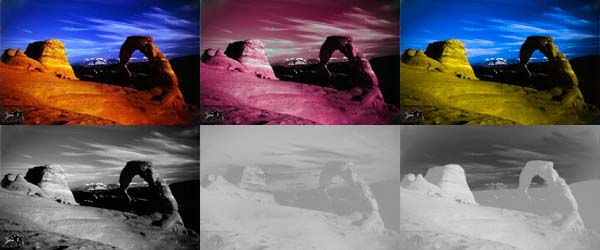
Lets see how the 3 Lab channels (L, a and b) define the image data - here is a colour
wheel.
|
|
|
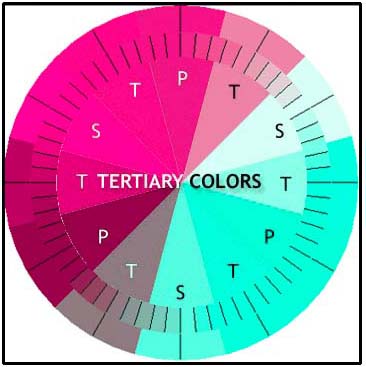
This is the a channel, which specifies the
colour as either a Green
or a Magenta hue, |
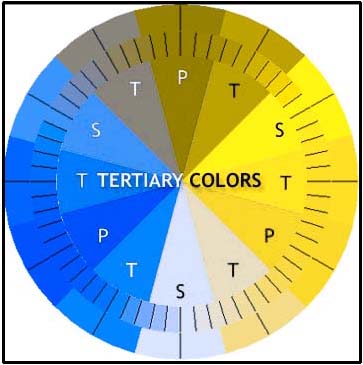
and the b channel, which specifies the
colour as either a Blue or a
Yellow hue. |
|
I think you should be able to add these colours together (in your mind's eye)
to give the original image colours - fairly intuitive and much much easier
than RGB.
|
|
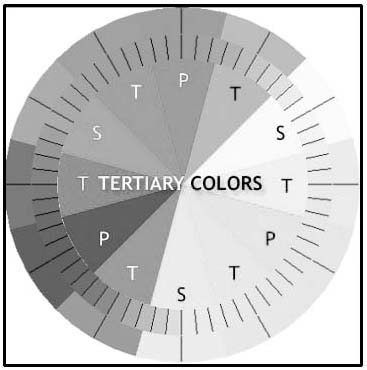
The L channel (below) just specifies the Luminosity or the black and white tones of the image
- no colour here at all.
|
|
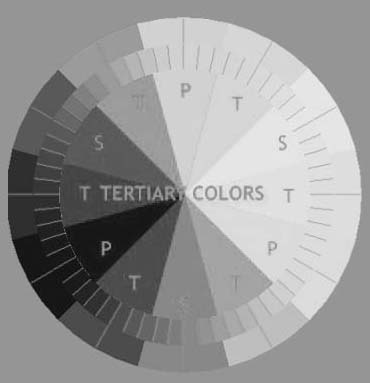
Photoshop shows all channel data in grey-scale and so the a and b
channels will actually look like this... |
|
|
|
|
Click here to compare the image in the RGB channels (in a pop-up window)
- I couldn't deduce the colours by looking at the rgb channels - can you?

Just to complete looking at channel data, lets see what happens with
Black&White...
|
|
And how does this image look in the Lab channels? |

|
|
Obviously the L channel is identical, but (surprise, surprise),
so is the colour representation of the a and b channels -
why?
Well because a neutral (grey) colour is neither green nor magenta and is
neither blue nor yellow!
|
|
|
But if we look at this image using Photoshop, to see the a
and b channels, then they look like this! - why?
Because there are no tones in the colour channels, everything is grey,
be it white, black or in between - the tone is defined by the L
channel values. |
 |
|
|
|
Over 70% of my images are post-processed in Lab, as you will notice in the
"Before/After" album.
To put an image into Lab mode, select Image>mode>Lab color from
the Photoshop menu bar, if it has adjustment layers in it, then you will
have to accept the Flatten option.
If you want to know a little more about the lab channels, then click
here - or use the menu on the left to explore.
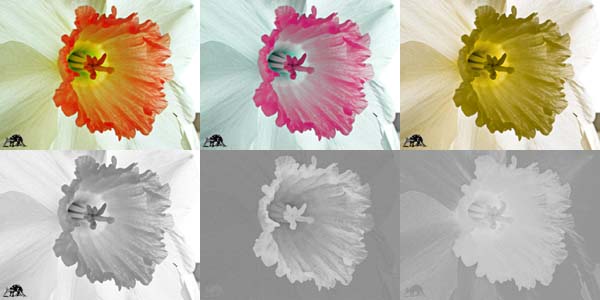
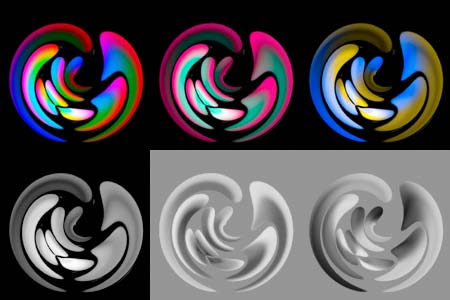
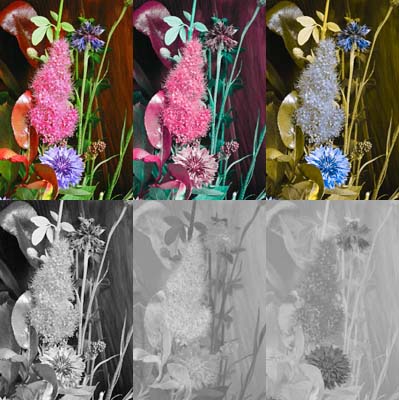
Here is a Photoshop Action that will display
the lab Channels for you and here are some examples - see how easy it is to work
out the colours.
|
The images are
shown in this grid order |
|
| Original |
coloured
a channel |
coloured
b channel |
| L channel |
grey-scale
a channel |
grey-scale
b channel |
|

|