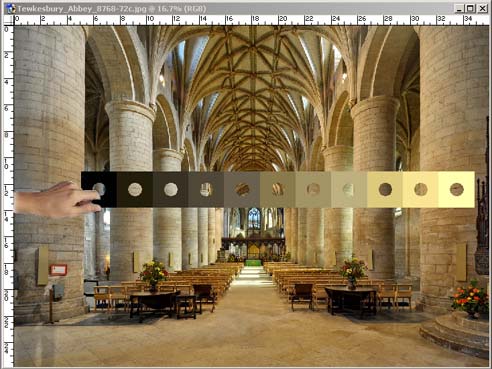


The Colour Watcher ToolI made the Colour Watcher to help me learn, and use, different Colour Spaces in my post-processing. The program has grown a bit over the years and is now more like a Swiss Army Knife! I have added a new feature ... The Colour Tone Ruler
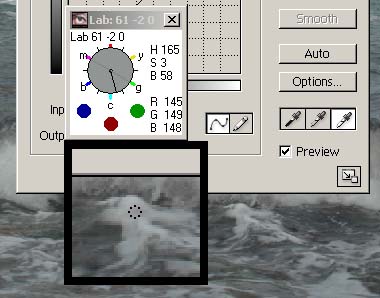
The other features of the program are as follows ... Colour Spaces and ValuesThe program samples the pixel under the cursor, even while you are using other programs, and can display one or more of the RGB, HSB, Lab, HEX or Munsell values. In addition the colour can be display diagrammatically which can be easier to understand and read than the numerical readout. Here are some examples of how the colour watcher/picker/sampler/dropper can be used...
Click here, or on the Display Modes button, for further information. Working ModesNormally the program will dynamically show the value of the colour as you move your mouse around, but you can also monitor a static point to see how it changes as you alter an image or help with specific changes.
Click here, or on the Working Modes button, for further information The Munsell Swatches
Screen Calibration checksYou can use the Watcher to produce a Calibration plot to see
how your display responds and changes over time.
The left plot is my reference sRGB one and the one on the right is what happens after the conversion to Lab. Click here, or on the Calibration button, for further information.
DownloadsIf you wish to use the program, just download it (virus checked by avast), unzip it and place the program on your PC (sorry it will not work on Macs) in a folder and create a short-cut to it. [Click here to download the older version 3.] The program is completely free and there is help (maybe worth reading once). You may also need the Munsell data, download it here by right-click and 'Save Link As', which must be placed in the same folder as the Watcher program, if you want to explore, use or display the Munsell colour space. Here is the Ruler definition file by right-click and 'Save Link As' for the Zone System (invoked by hitting the '1' key) and it is simple for you to add further definitions - again needs to be in the same folder. |