
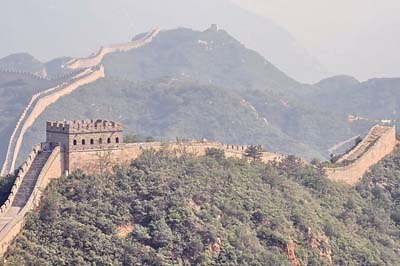
Here is a lovely image posted by Russell on a web forum, but he had to photograph it under hard lighting with haze in the background. The exposure was 1/500", F/9 at ISO 320 using the zoom at 119mm. I said it would look great with a bit of post-processing and he invited me to try, providing I detailed the steps I took.
But before I started, I always want to consider the image and the story that it could tell.
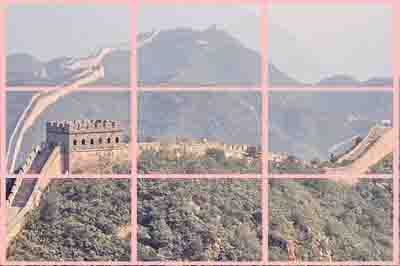
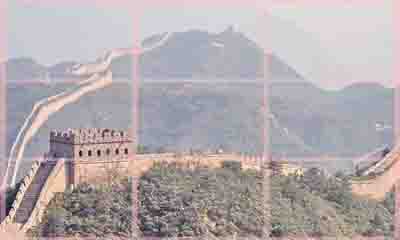
This is one of the great sights of the world - a wall that stretches for thousands of miles and can be seen from space - and so its abrupt ending, on the right side of the picture, did not convey this to me. I think Russell found this interesting and included it in the image, but I would crop it off to give the impression that this Wall goes on for ever. The other advantage of this crop is to position the main tower more towards a 3rd position and if we remove some of the bottom foreground, then the horizontal walkway would also be positioned on a 3rd.
| from this |
|
to |
|
Note
that because of high jpeg compression there are artifacts, especially in the
sky, that would not be there in a full size image.
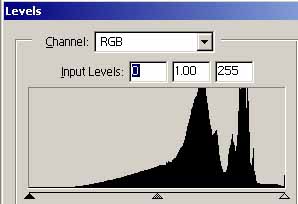
| The exposure does not use the whole range of
levels, as shown in the histogram opposite - the left end of the histogram
is well shy of zero level and by adjusting this, to around 36, will
considerably help the overall contrast of the image.
Each technique corrects this, either as part of the first step or beforehand.
|
|
For fun (and out of interest to see what would result and because I got a bit 'carried away') I used 11 different methods of adjusting this image
3 auto features
2 web recommendations
3 different curving methods in RGB
2 example of Lab curves
and 1 (automated) channel blending
You can compare them by following this link which will open in a new window allowing you to flick between them. When you've seen them, then close the new window.
It should be born in mind that interpreting an image is a personal thing and as I did not see this wonderful sight, I may have made the grass too green or the wall too red. However the above corrections are just the first step in processing an image - so I've taken what I consider to be the best method and further processed it as follows.
click here (or on the side menu) to see how I enhanced (?) the image a little more .
Hope you enjoyed this experiment, I certainly learnt a lot.