Step 3
It can said without a doubt that the Minute/Ratchet has started badly! I couldn't drill all the connecting holes as the wood hit the drill post. I managed 2, then turned the wood over and finally did the last one by eye. I'm rather ashamed to show the result - just thank heavens that I followed the plan and the wheel and ratchet are perfectly aligned because they were pinned together before I started!
I am using some 12mm laminate flooring, as I do not have enough of the 8.5mm stuff. Apart from the fact that the holes are not at 90 degrees (apart from the 2 bottom left on the right image of the wheel), the wander is enormous as the wee drill bit goes through 1" of 2 layers of MDF.
I did some test pieces and now know that the drill bit is so small and bendy, that one hasn't got a hope of getting a vertical hole through one inch of wood. I will therefore try drilling though just one piece (with the minimum bit length) before drilling though both and see if that helps. Seeing as things have gone badly, I'll start cutting out the Ratchet before tackling the wheel.
And here she is with her frilly skirt!
You are looking from the front of the clock and the ratchet will attach to the back of the minute wheel.
By using 12mm for the ratchet and 8.5mm for the pawls, it solves the problem of clearance to make sure that the pawls can easily move.
So then on to the Minute wheel...
Here is the Minute wheel before I start the serious work on the teeth. Wow, I thought cutting MR MDF was hard, but it took 2 blades and over 20 minutes of cutting to cut around the wheel - and that is only 33 inches. Works out at just over an inch and a half a minute - tough stuff.
Out of interest the wheel weighs 567 gm (20 oz).
I also decided that is was safer to attach the template to the front to ensure that there is no chipping of the front edges when I drill out the teeth gaps. Not overly sure I made the right decision, but I used a paper template and then the transparent film over the top of that.
I'm terrified of doing anything wrong with this wheel as it is so hard to cut. So before progressing I wanted to check that I could drill the teeth gaps correctly. I did a few experiments and found that if I did not drill all the way though (on a test piece), then I could snap off the bits, after cutting out the teeth, without chipping the back surface and then sanding would finish it off okay.
I brought some really great sand paper. B&Q had a remainders bin of some fabric backed belt sanding paper that is usually £10, for 3 small belts, and they were selling them at a £1 for 3. I got some 60 & 160 grit. The 60 stuff quickly removes the wood, so I can safely leave quite a large amount of red showing after my cuts before going down to finer grit levels.
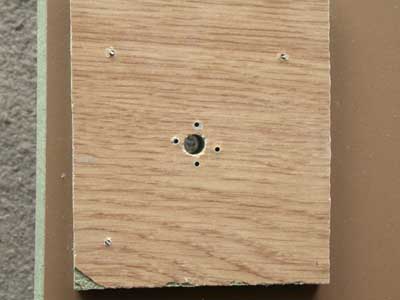
Anyway I decided to jump ahead in the step order and cut out the 6" Movement/3rd wheel to experiment on drill out the teeth gaps. This is only 8.5mm thick and much easier to deal with.
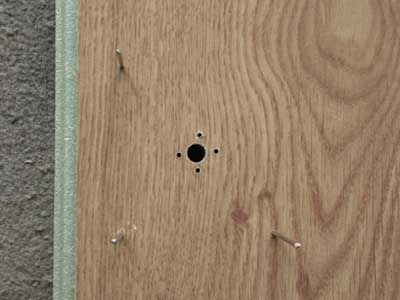
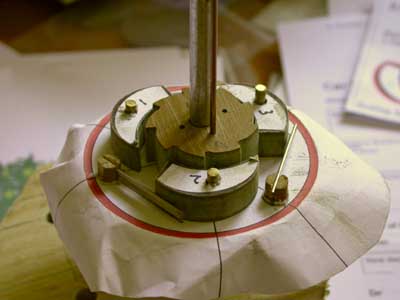
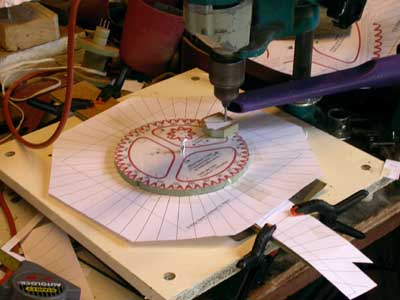
I used the large paper template to accurately give the correct angles for the gaps. The arbor hole was packed with paper to minimise the play in it.
As the drill wobbles so much, I found that a 3mm drill instead of a 3.5mm one left a little margin for the sideways movement of the drill and sanding would finish it off nicely.
The wee block is present as (a) I do not have a drill stop and (b) to keep the puckering of the plastic film to a minimum.
I'm using an old vacuum cleaner to powerfully suck the dust away for drilling, cutting and sanding as MDF is terrible stuff to breathe.
This went very well, so I put it aside and drilled out the gaps on the Minute wheel - my it is boring drilling 80 holes!
Next page