
WoW Processing - step by step
I took the picture on the morning of the 21st October, but did not start to play with it until the 30th – time for the memory and experience to mature and time for me to begin to analyse what I experienced and how I could possibly attempt to convey it to others.
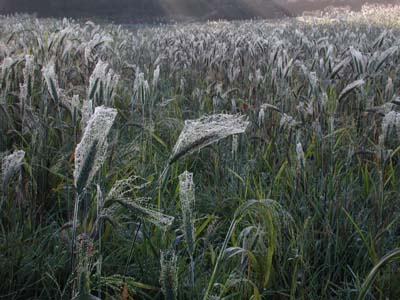
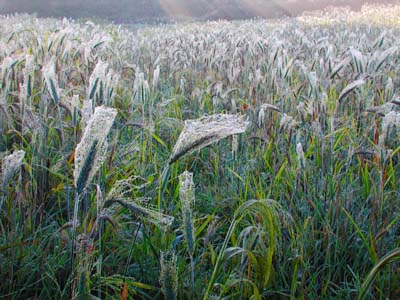
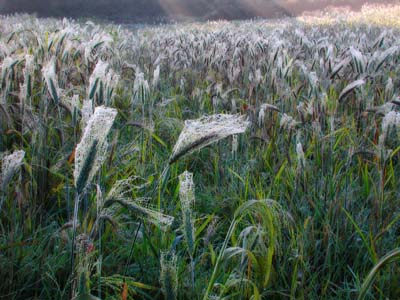
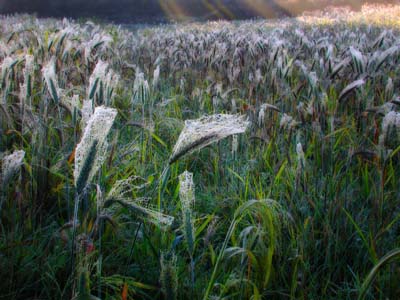
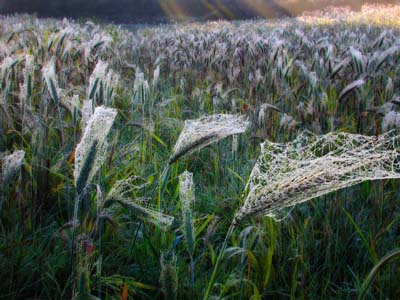
What did I see and want to show? I saw the dewy detail of the webs and then the mass of almost cotton wool like webs stretching into the distance and up the hill and being crowned by sunbeams. Everything was peaceful and still and if it had been a bit warmer one could almost imagine fairies harvesting the webs!
|
In photographic reality I had taken 3 dull images with little contrast, two of which were salvageable – the sun was pointing directly into the camera. Taking a picture with the sun behind me would not have captured the quality of light on the webs. What I had took were
the two most important aspects of the scene
|
 |
| First I had to enhance the general view to attempt to show some of the
magic of the light and the scene.
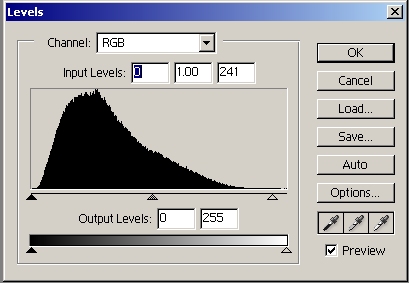
The exposure was pretty good with no blowing of the highlights (I had used an adjustment of –0.7EV) and so I applied a small change to levels (255 down to 241) to slightly improve the dynamic range. |
 |
| Next I ran my standard LabColourSaturation Action to
enhance the colours a little and kept the change at 100% opacity. Of
course I should have left this adjustment until later on in the work flow,
but I wanted to see the colours now - and so broke the work flow rules!
I should mention that I have developed my standard Actions as a result of reading other people’s ideas, although some are my own. I’m therefore building on the work other people have done and been kind enough to share or publish. |
 |
| To increase the contrast I ran the LocalContrast 100px
Action. 100px is a whopping amount, but 25 or 50px did not give enough
overall punch.
I then reduced the effect by changing to a Luminosity blend and toned the opacity down to 46%. Because of the tonal detail in the foreground this would emphasis the grass and stalks more than the webs. I now had a more colourful contrast image but it was still dark with the grass and stalks dominating the image – and it does not sparkle. |
 |
|
I needed to put some lightness into it and get the webs in the distance more like cotton wool balls, so I experimented with a gradient in an Overlay Layer to lighten the webs in the background. This made the foreground too dark, so I ran the LightenShadow Action and altered the opacity to suit.
|
 |
| I now had a completely different image with the extra
lightness, which was giving
more of the message I was trying to suggest. So what about a bit of blur?
The Mystic blur Action can give an image more depth and a sort of glow/sheen. The result was much better in showing the effect I wanted to portray (notice the softening and tones in the distance webs) - so I could scrap the previous idea. |
 |
| However there was not sufficient variation in the light in
the foreground, it was just that little bit too flat – so I added some
Emphasis by using a Multiply blend with a simulated sunbeam (by removing
some of the layer).
I then reduced the darkening effect by lowering the opacity to 60%. And finally added a touch of colour to the distant sunbeams with a Colour layer (at 35%).
|
 |
| So then it was just a case of extracting, adding and scaling
the close-up shot to the empty space on the bottom right.
By pure luck there was a stalk I could attach it to! And it even allowed me to place the close-up on a 3rd! A little Gaussian Blur (0.6) and a tweak of a Curve were all that was needed to make it look as though it belonged. |
 |
| So only 3 automated Actions were needed with decisions about
how much of a particular effect I wanted. A little soft painting on
the Emphasis and Colour Layers and, of course, the fairly painless extraction (just
used the magic wand and added in the inner bit of corn).
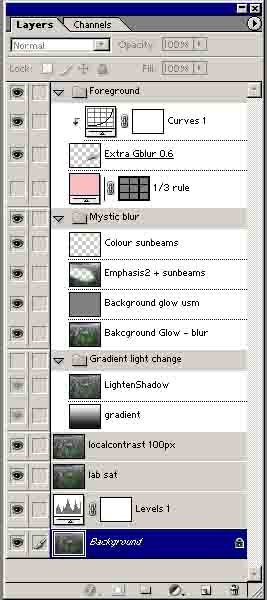
Here is the final Layers palette. I am happy that the final image goes some way to expressing what I saw and experienced. One has to ask the question is this still a photograph? - it is certainly an image. Have I changed things too much that one could say that I have cheated? I’m coming to the conclusion that, in the film days, people have always manipulated photographs, especially when producing prints, by dodging and burning etc. or by using filters etc.; whereas today we can more easily manipulate them and so I believe we are moving into an era of Photo-Art where the post-processing phase is as equally important, if not more so, than the original capture.
|
 |
I hope my rambling may have been of some interest and possibly helped you.